 Jump for Animals
Jump Power / Height in Jump for Animals! (AnimalByte)
What you get: Train barbells, equip Trails for gain×, buy Speed Coil only when returns fail, and stack Training Frenzy for height — AnimalByte place 126870639873289, not GiovaDev treadmills.
Game version sep-2026 · 2026-09-28Run order
- Confirm AnimalByte place 126870639873289 (not GiovaDev +1 Jump For Animals)
- Train Jump Power at barbells near your plot
- Equip the strongest Trail you can afford (gain× while training — not an instant Jump Power multiply)
- Retest the next egg ledge before another steal
- Grind Training Frenzy windows with that Trail equipped; buy Speed Coil only if the return trip is the bottleneck
Where this comes from
| First-party | Official AnimalByte loop — barbells, Trails, Speed Coils raise height for steal→hatch. |
| Multi-source | Several community guides’ Jump Power Trails×9 table (shop snapshot shape) + Events Frenzy cadence; community creators’ barbell+Trail clips combined. |
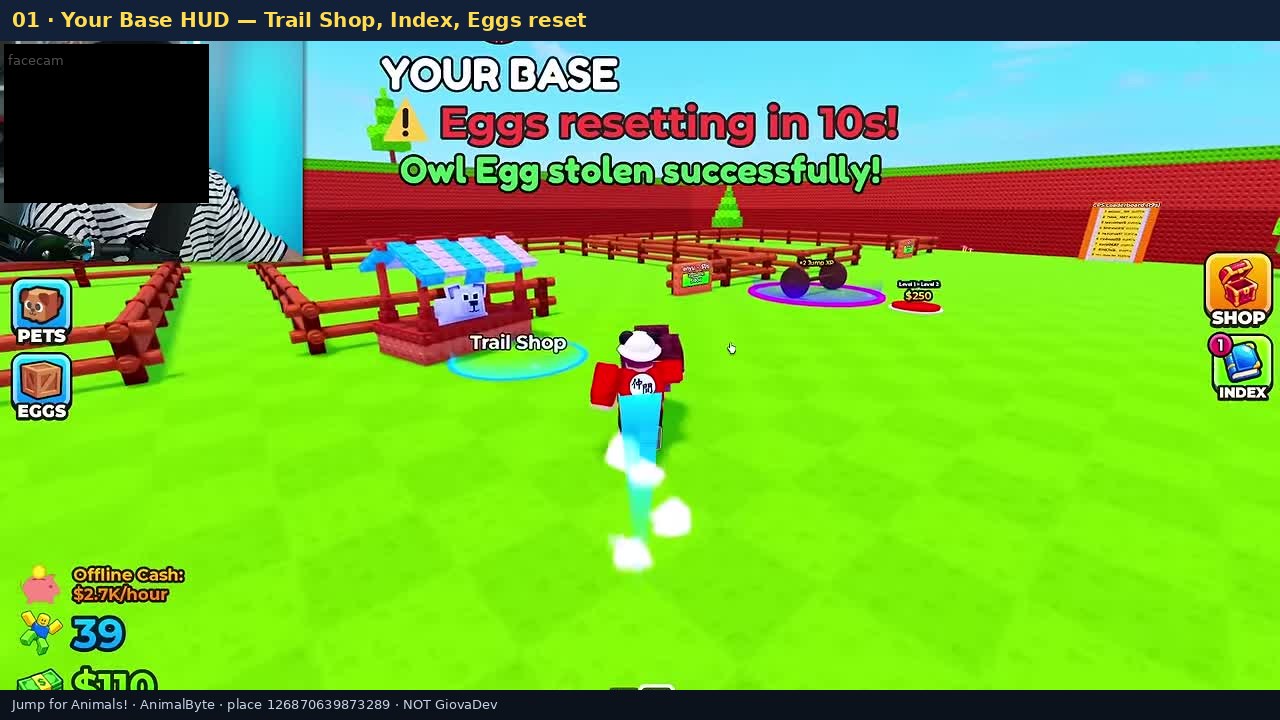
| Video captures | Trail Shop pad by plot; Jump XP training pad; Coils shop near Mutation Machine — goal→steps, not frame dump. |
| Unknown | Exact Jump Power gates per ledge; live Trail cash prices can drift after shop snapshots. |
What you get: Reliable height on Jump for Animals! by AnimalByte (place 126870639873289) — barbell XP, the nine Trails, Speed Coil timing, and Training Frenzy pairing — so you clear the next egg ledge, steal, and hatch. This is not GiovaDev: there is no treadmill main loop, no Lucky Blocks, and no rebirth-as-height-core on this place.
Run order
- Confirm AnimalByte place
126870639873289 - Barbell train near your plot
- Equip best affordable Trail
- Retest the next ledge
- Frenzy grind when live; Coil only for failed returns
Disambiguation first
This is not GiovaDev +1 Jump For Animals (place 101386335119838) and not the hub loop of the other game (treadmills, rebirth, Lucky Blocks, Diamond/Ruby/Emerald). Height here comes from barbells + Trails + Coils, then you steal guarded eggs and hatch — you do not pick up floating world animals. If the HUD pushes treadmills or Lucky Blocks, leave that experience.
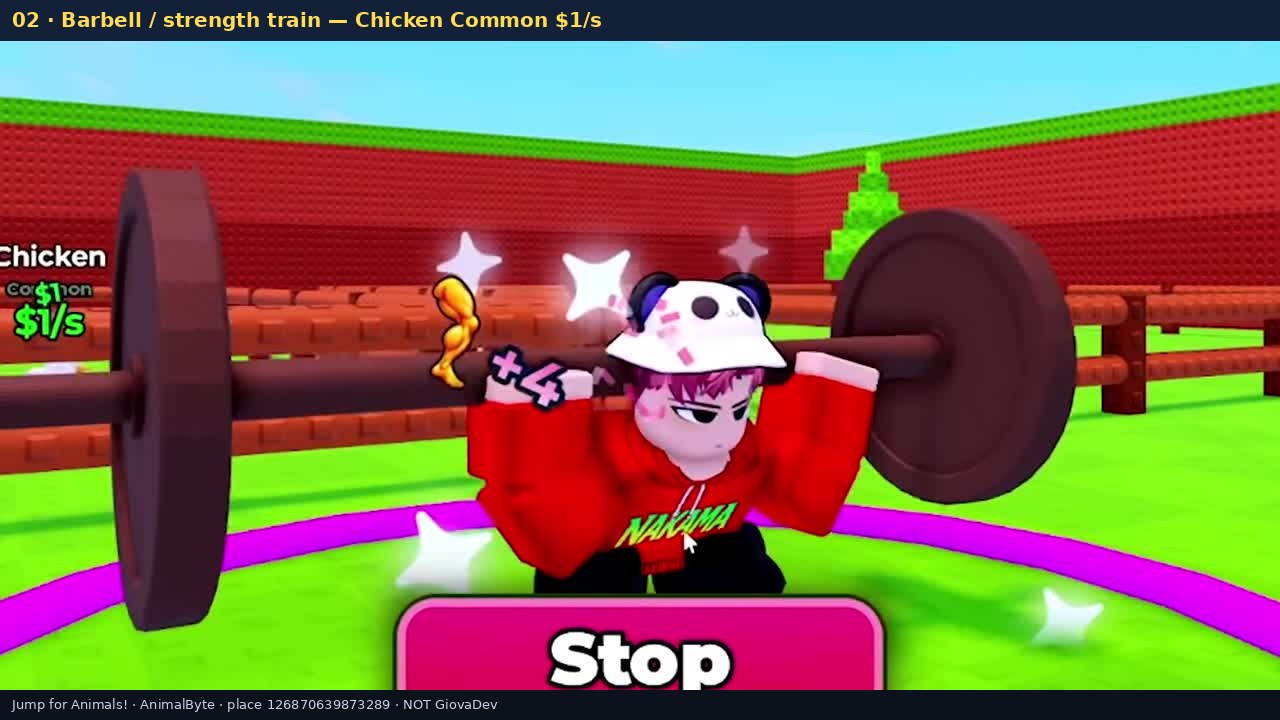
Goal → steps (barbell train → steal ledge height)
- Confirm you are on AnimalByte place
126870639873289(HUD: barbells / Trails / Coils — not treadmills / Lucky Blocks / rebirth). - Stand on the Jump XP / barbell pad by your plot (clips show early costs like Level 1→2 snapshots — treat cash tags as live-shop truth).
- Equip a Trail before you spam jumps — Trails multiply Jump gain while training, they do not instantly multiply your current Jump Power by the same factor.
- After a cash dump into a new Trail (or a Frenzy window), do a ledge retest: walk to the next egg ledge you actually need and jump it with margin before another steal.
- If you still miss, stay on the pad — do not steal an egg you cannot return. Buy Speed Coil only when the return trip is the bottleneck (Coils ≠ Jump XP).
- When Training Frenzy is up (~7 min inside the ~30 min global rotation), grind with your best Trail equipped for 2× Jump XP — ignore mid-window Trail shopping; retest the ledge when the banner ends.
- Clear height → run the steal loop → hatch → park in Pen for income (see the tier list, animals, eggs, areas).
Exact Jump Power per ledge = Unknown. Jump Power per ledge is not published — train, retest the ledge you need, then steal. Twin treadmill “JumpPower” tables are the wrong experience.
Trails ×9 (shop shape)
Buy Trails from the Trail Shop pad by your plot. They add a movement trail and multiply training gain. They do not instantly multiply your current Jump Power by the same factor.
| # | Trail | Jump gain× | Unlock / price (shop snapshot) |
|---|---|---|---|
| 1 | Blue Trail | 2× | Tutorial |
| 2 | Red Trail | 2.5× | 50,000 Cash |
| 3 | Green Trail | 3.25× | 750,000 Cash |
| 4 | Yellow Trail | 4.25× | 10,000,000 Cash |
| 5 | Purple Trail | 5.5× | 150,000,000 Cash |
| 6 | White Trail | 7.25× | 2.5B Cash |
| 7 | Black Trail | 9.5× | 40B Cash |
| 8 | Galaxy Trail | 12× | 750B Cash |
| 9 | Crimson Star Trail | 16× | 12.5T Cash |
Shop prices: Cash tags above follow the published Trails×9 shop shape (Sep 2026 shop snapshot + AnimalByte clips). Match the live Trail Shop before you empty the Pen — prices can patch. Climb Blue → Red → Green as soon as each is cheap for you; sitting on Blue after Red/Green is affordable stalls every ledge after Meadow.
Speed Coil vs Trail (decision)
| Buy | When | Why |
|---|---|---|
| Better Trail | You can afford the next SKU and still need height | Multiplies Jump gain while training |
| Speed Coil | You clear the ledge but die / get pinned on the run home | Movement on the return — not training XP |
| Both | Frenzy window + long carry | Trail for XP; Coil for the steal return |
Coils sit near the Coils shop (same Pen-area landmarks as the Mutation Machine on late-ladder maps). Buy a Coil only when the return trip is the bottleneck.
Training Frenzy pairing
- Effect: 2× Jump XP while training for about 7 minutes — stacks with Trail gain×; it is not a twin treadmill belt.
- Cadence: About one timed event every ~30 minutes, global — hopping servers does not swap the live window. Read the Next Event board in your session.
- Playbook: Equip best Trail → park on barbells for the whole window → ignore mid-window Trail shopping → ledge retest when the banner ends → then steal.
- What Frenzy is not: not an instant Jump Power multiply, not a Lucky Block roll, not a rebirth reset.
- Full rotation (Cash Rush / Purple Aurora): see the events guide.
AnimalByte vs twin (do not copy treadmills)
| Signal | This wiki — AnimalByte | Twin / GiovaDev wiki noise |
|---|---|---|
| Place ID | 126870639873289 |
Other Jump For Animals places |
| Height train | Barbells near plot | Treadmills × ladders |
| Gain item | Trails (gain× while training) | Rebirth / Lucky Block loops |
| Mobility buy | Speed Coil when return trip fails | Treadmill belts as “JumpPower” |
| Event | Training Frenzy ~2× Jump XP window | Twin event names |
If a guide’s first tip is treadmills, Lucky Blocks, or rebirth-as-height-core, you are reading the wrong experience. Leave that place.
Ledge retest (height proof)
Height on AnimalByte is proven by a ledge retest, not by copying a twin JP number:
- Equip your best affordable Trail (gain× while training — see Trails×9 table).
- Barbell-train through a short cash dump, or park the whole Training Frenzy window (~7 min · 2× Jump XP) with that Trail equipped.
- Walk to the next egg ledge you actually need and jump it with margin before another steal — exact Jump Power gates stay Unknown.
- If you still miss, stay on the pad; do not steal an egg you cannot return.
- Buy Speed Coil only when the return trip is the bottleneck — Coils are movement, not Jump XP.
- Re-check the live Trail Shop cash tag before a big Pen dump — shop snapshots drift.
Still no published Jump Power per ledge. No treadmill ladders, no rebirth-as-height-core, no Lucky Block height loop on this place (126870639873289).
FAQ
Height vs Jump Power — are they the same?
On this place, height is what clears an egg ledge; Jump Power is the training number that raises that height. You prove height by retesting the ledge after barbell XP with a Trail equipped — not by copying a twin-game height table. Exact JP per ledge stays Unknown.
How high do I need to jump / how much Jump Power for the next ledge?
Exact JP per ledge is Unknown — AnimalByte does not publish gates. Train with your best Trail, retest the ledge you need, then steal. Do not use height tables from other Jump games. After you clear height, use the steal loop, then park income via the tier list and animals.
Do Trails instantly multiply my current Jump Power?
No. Trails multiply gain while you train. Your current number only climbs as you keep hitting the barbell with a Trail equipped.
AnimalByte vs twin treadmills — which height loop is this?
AnimalByte place 126870639873289 trains height on barbells near your plot, with Trails for gain× and Speed Coil for the return trip. Twin / GiovaDev pages that lead with treadmills, rebirth, or Lucky Blocks are the wrong experience (place 101386335119838). Leave that place; this guide stays barbells / Trails / Coils only.
How many Trails are there?
Nine — Blue through Crimson Star. Always confirm the live shop row before planning a cash dump.
Best Trail?
The strongest one you can afford and keep equipped while training. Jump off Blue the moment Red or Green is cheap.
Frenzy vs Trails?
They stack for the window: Frenzy raises Jump XP; Trails raise training gain. Use both when the event is live.
Wrong game?
If the HUD pushes treadmills, rebirth, or Lucky Blocks, leave — that is GiovaDev place 101386335119838, not AnimalByte 126870639873289.
Why do other guides say treadmills?
Those pages document the GiovaDev twin (or similar), not AnimalByte place 126870639873289. This page stays barbells / Trails / Coils only.
Where do I spend new height?
Clear the next nest → steal-loop → hatch → park in Pen. Rank Pen earners on the tier list; browse Linked $/s on animals and hatch paths on eggs. Reported codes and the HUD Codes button are covered on /codes.
Cobra / Red Dragon income?
TBA — not published here. No daily income is listed. They stay off the tier list S–F bands until Index-linked non-TBA income lands.
Common mistakes
- Stealing before the ledge is clear with margin
- Buying Speed Coil hoping it multiplies Jump XP
- Sitting on Blue Trail after Red/Green is affordable
- Ignoring Training Frenzy while grinding height
- Importing GiovaDev treadmill / rebirth timing into this save
- Treating twin “JumpPower” height tables as AnimalByte facts
Next
Open the AnimalByte Pen-income tier list for S–F ranks, the Animal Index animals hub for Linked $/s, eggs for hatch paths, and steal-loop once height clears the next nest. Events cover Cash Rush / Frenzy / Purple Aurora; egg-route spends new height on the Meadow→mid ladder. Patch notes (when multi-source) live on updates; codes status on codes.
Still unknown
- Exact Jump Power numbers per ledge unpublished — train and retest. Exact JP per ledge = Unknown (not published).
- Trail Shop cash tags drift; match the live pad before big spends.